【Github加速】利用cloudflare创建Github加速拉取项目
注意: 本文最后更新于 581 天前,内容可能已不再准确,请酌情参考。
前言
由于Github是国外的网站,虽然国内也可以访问,但是实际还是很慢,更别说拉取Github的项目,一些相关的文件等操作,所以今天给各位带来利用cloudflare白嫖他的Workers来配置加速Github项目拉取。
创建cloudflare帐号并配置域名DNS
可以参考下方文章,进行创建和配置域名的DNS,如果你已经OK了那我们继续下一步
配置Workers
- 首先我们点击
左侧的Workers 和 Pages,然后如图所示,点击创建Workers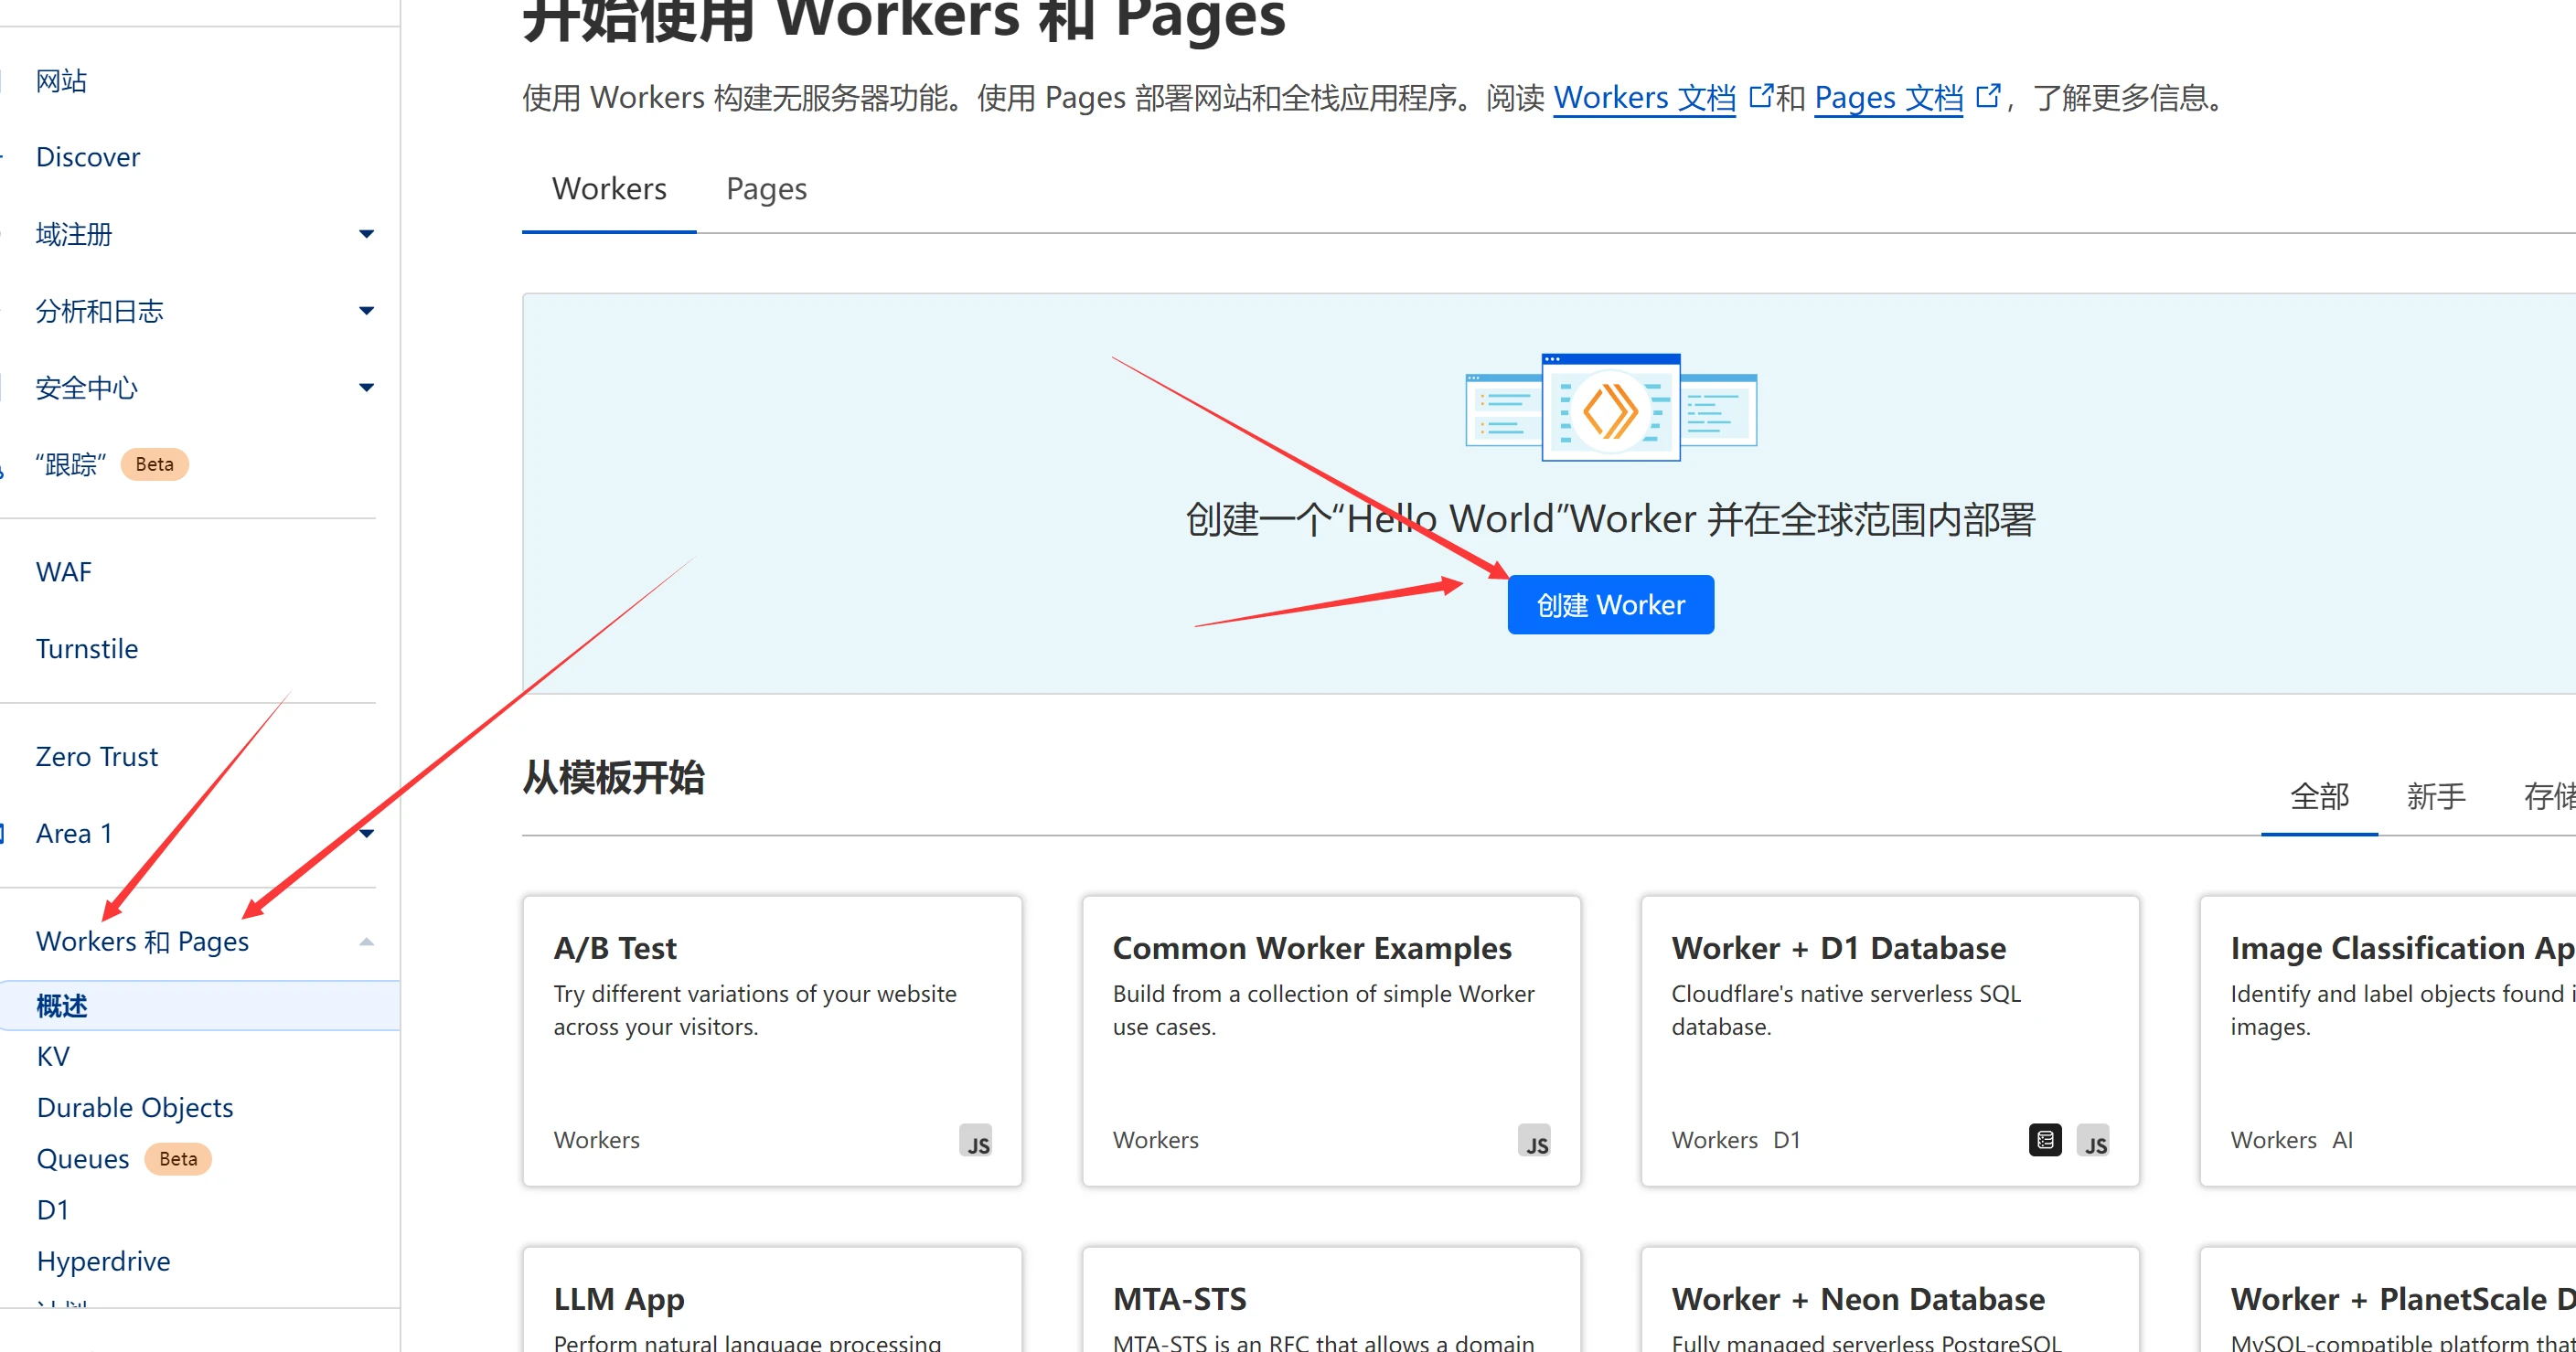
- 跳转
设置项目名,一般来说默认就行,你要自定义也行。设置好后记得点击保存,再点击完成即可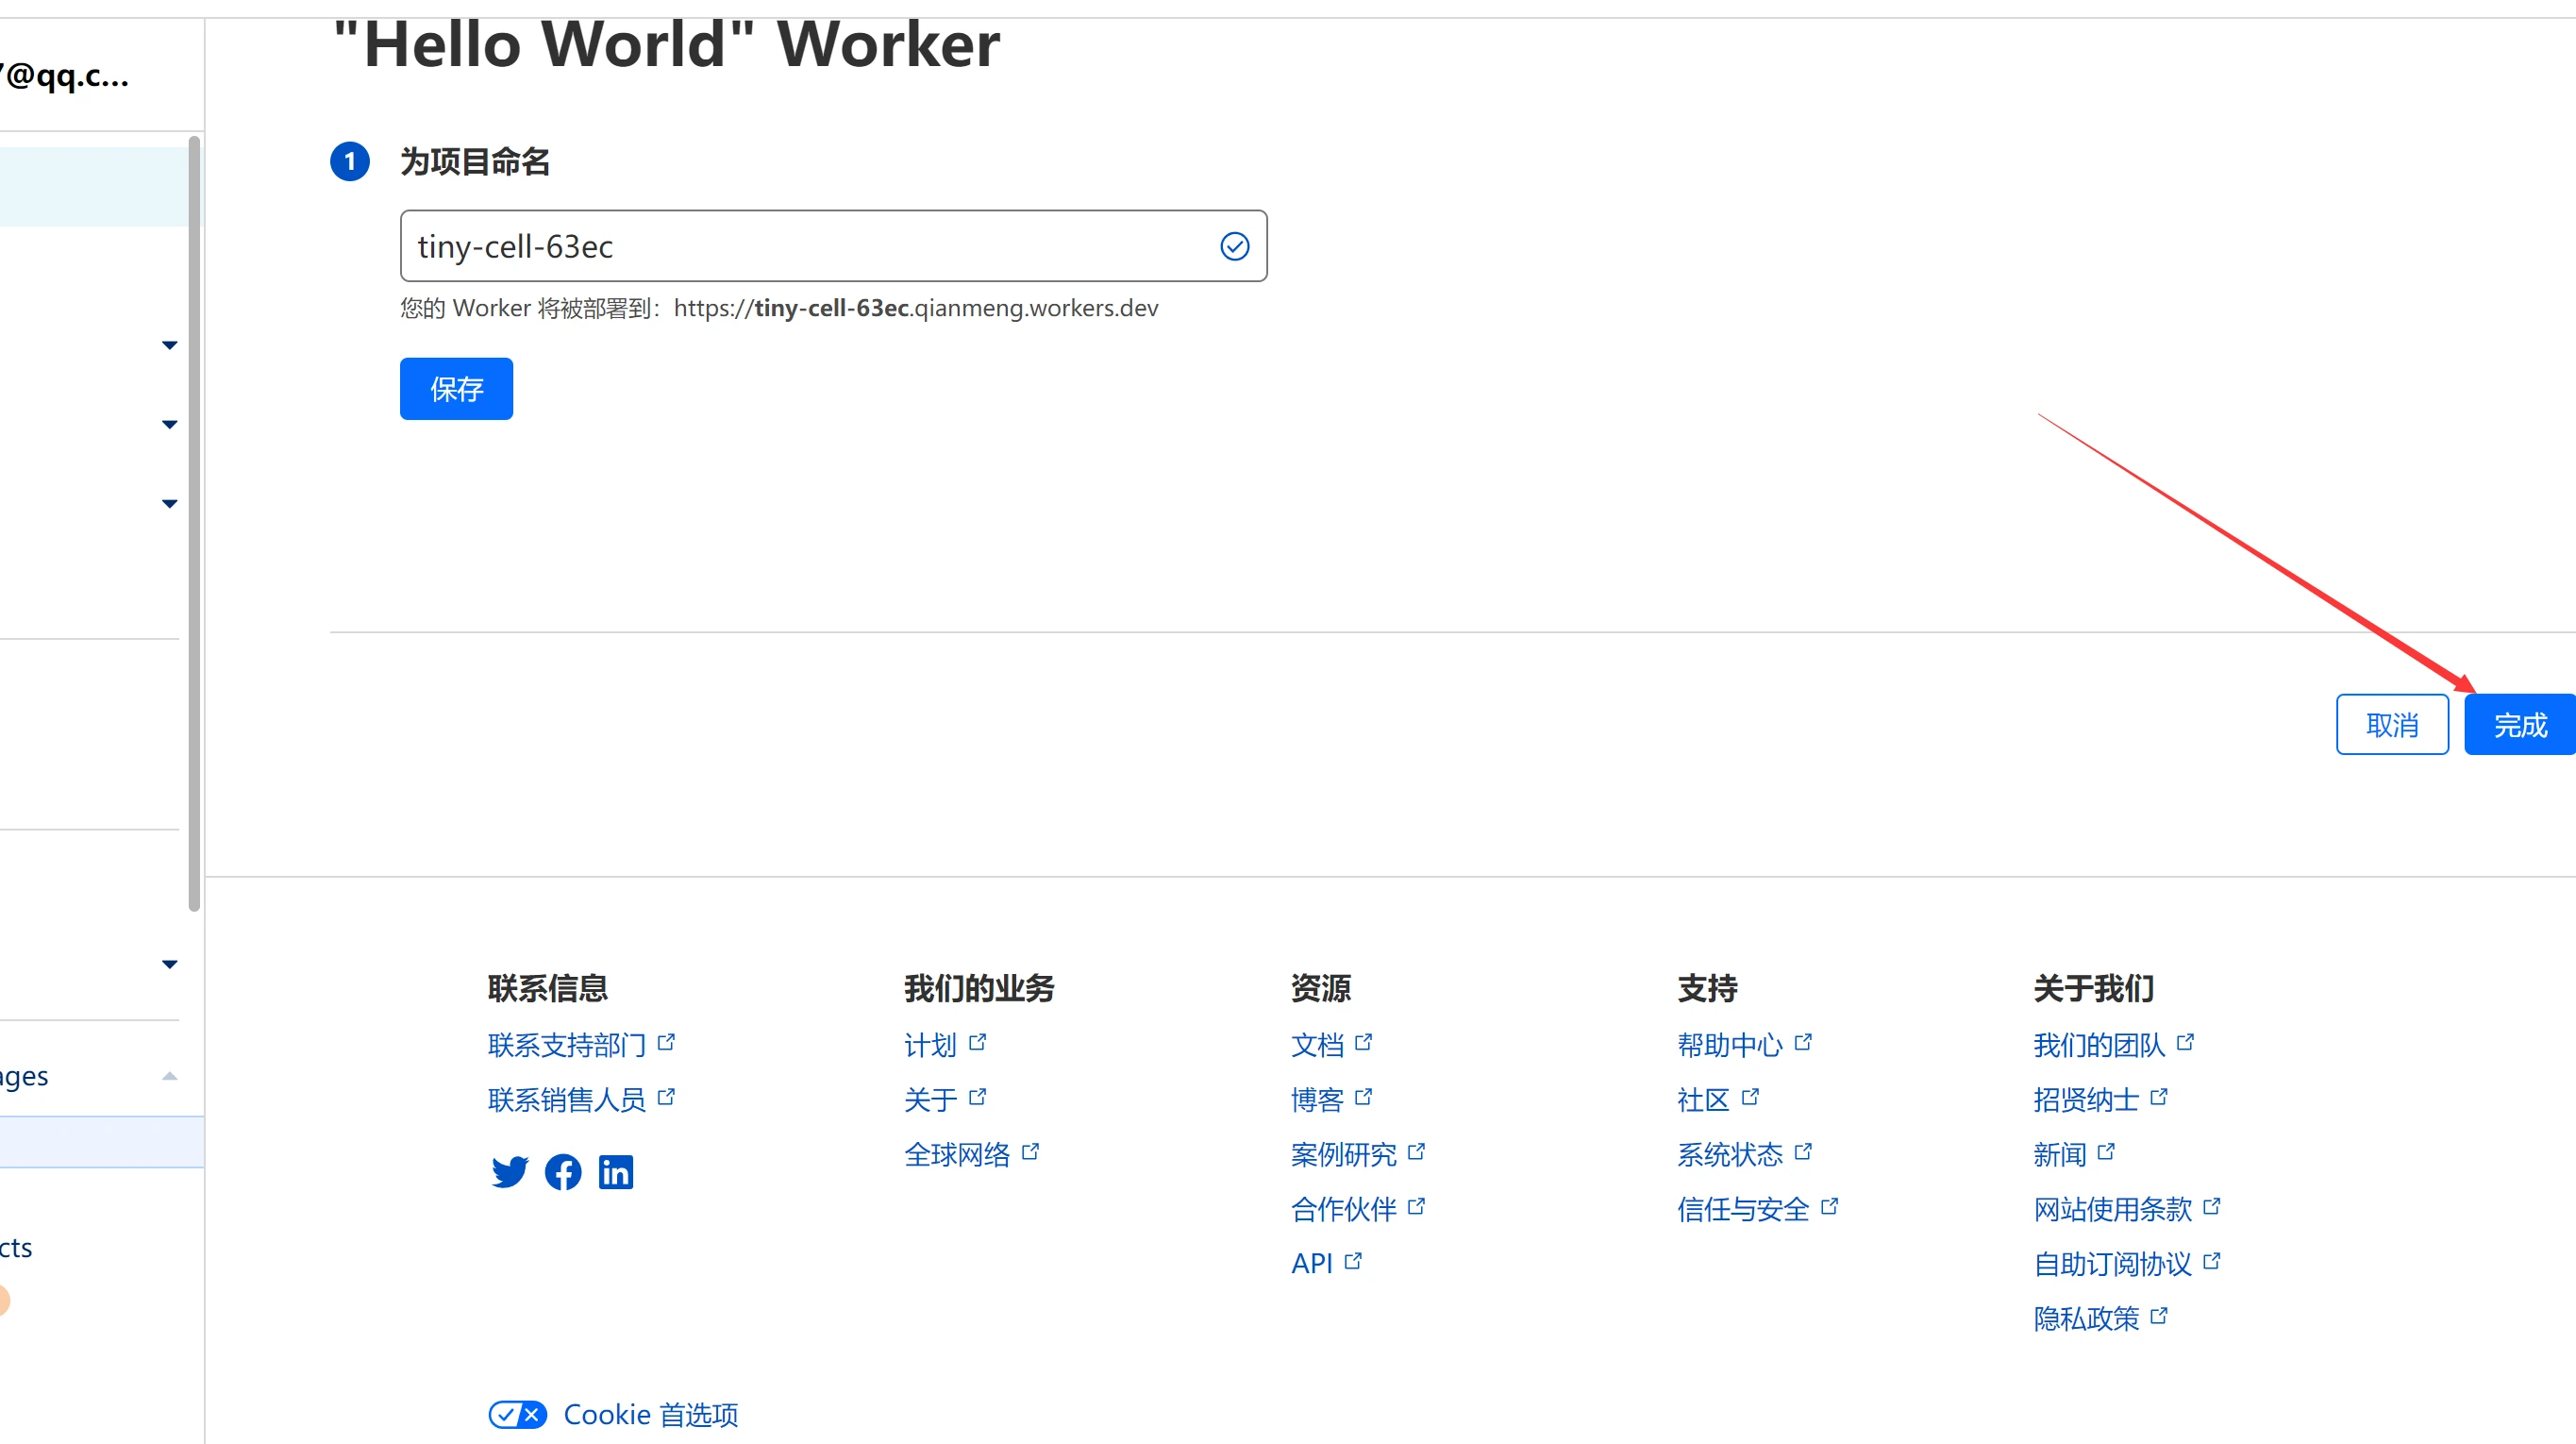
- 然后就会出现
成功!您的项目已部署到以下区域:全球,点击右侧的编辑代码。
- 跳转
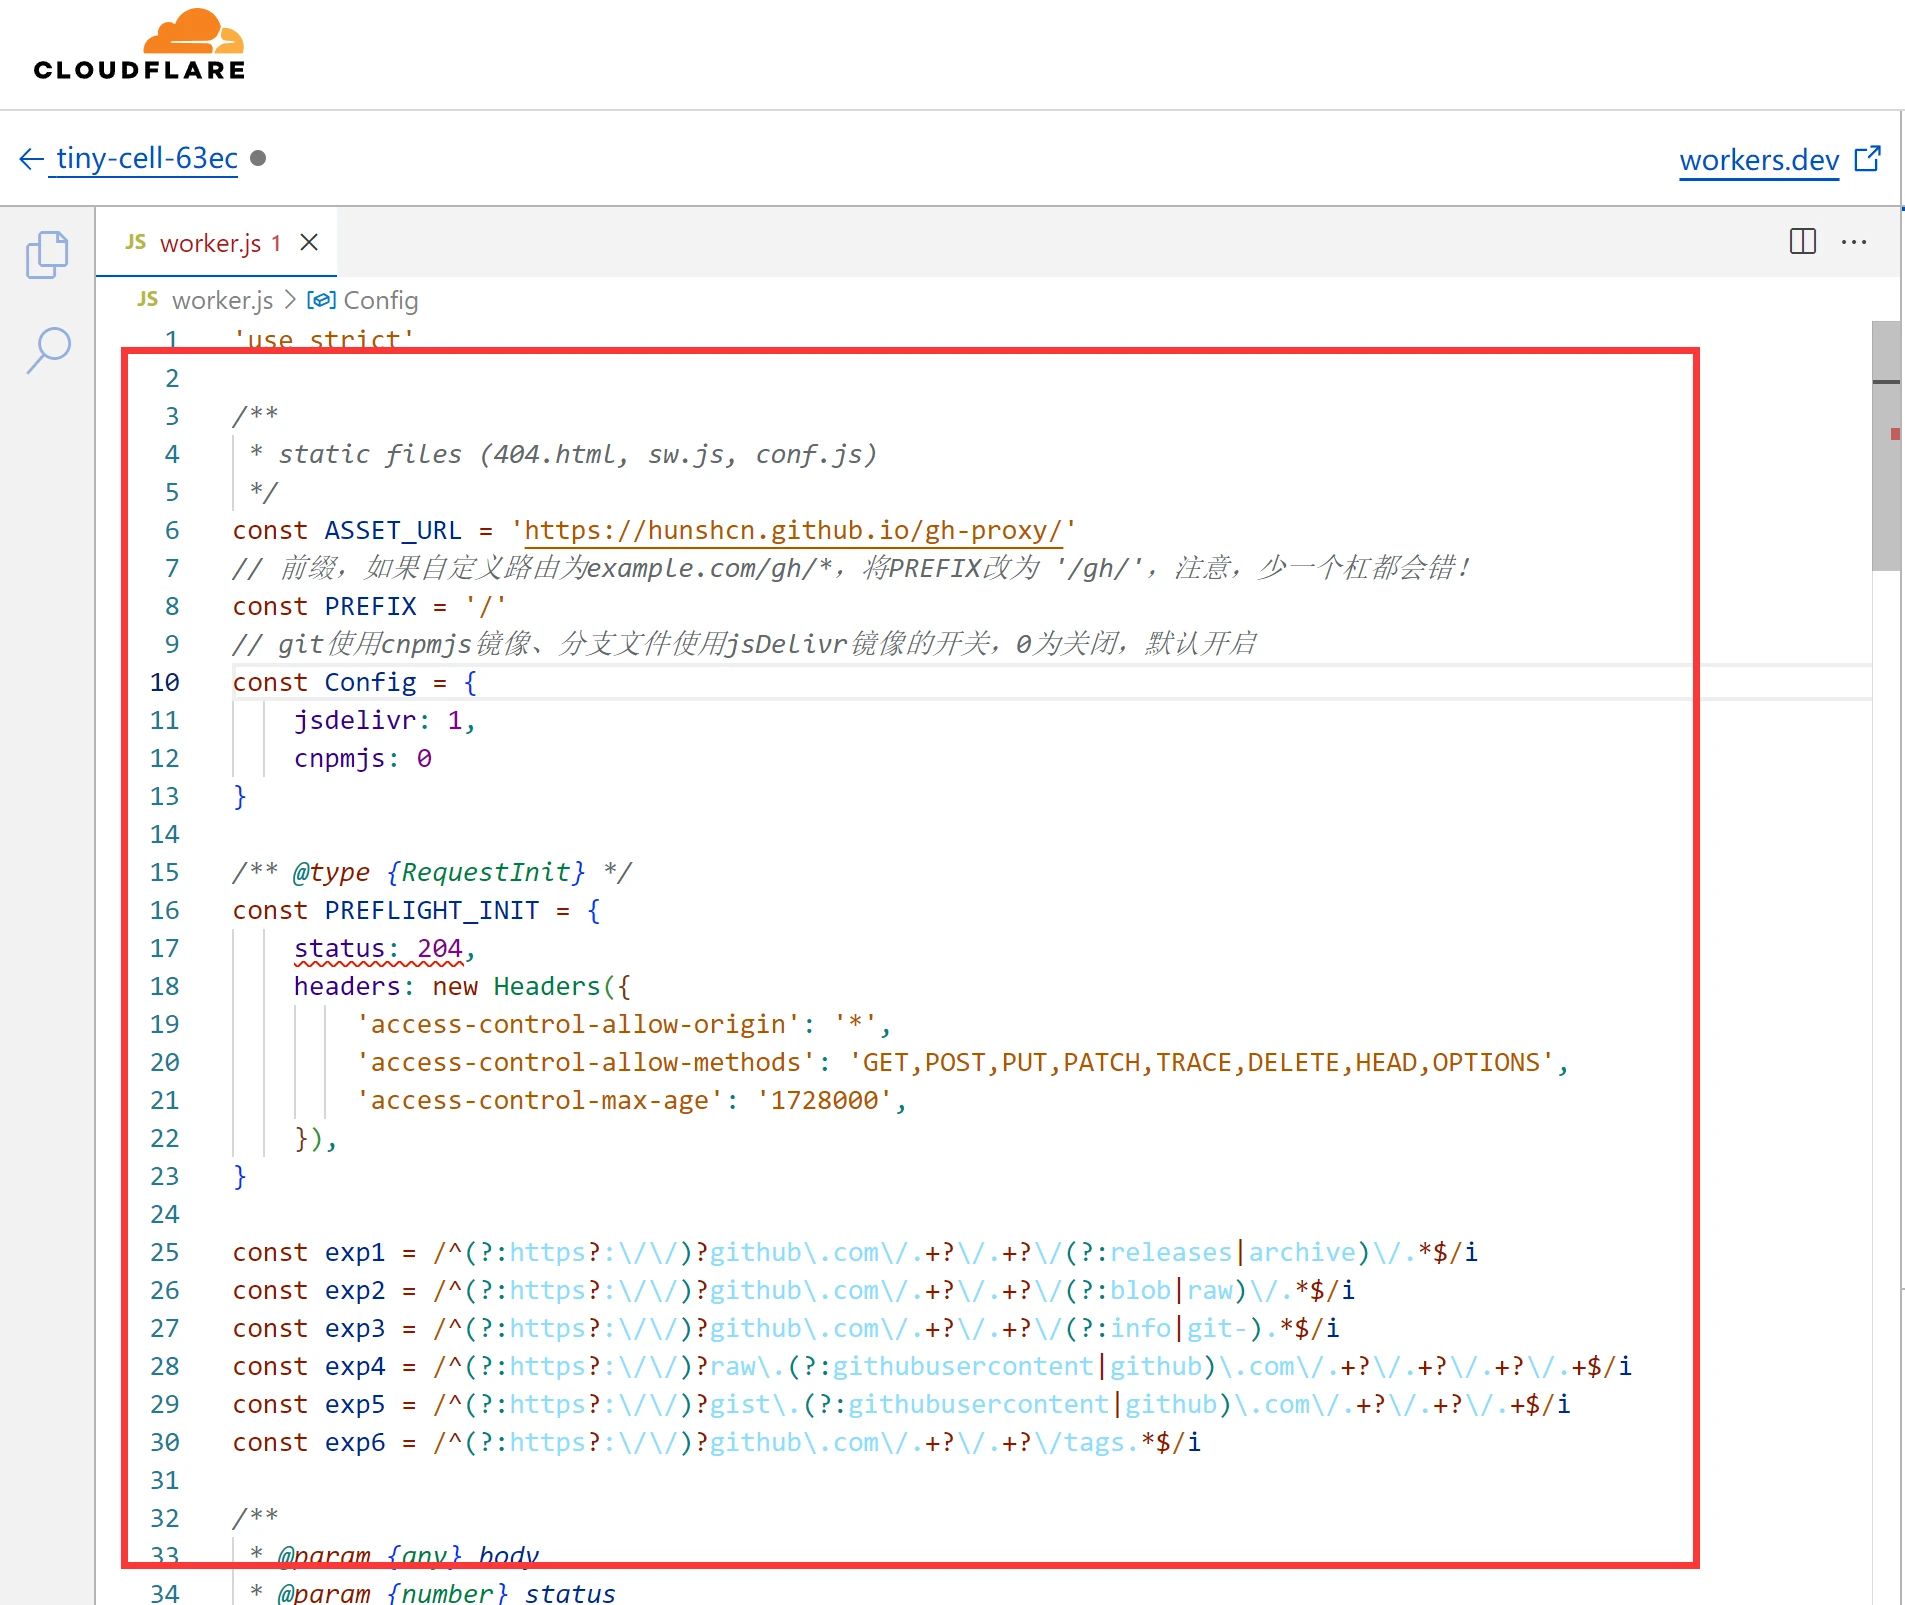
编辑代码的页面,我们将原有的代码全选,删除,复制下面的代码,黏贴到里面。'use strict' /** * static files (404.html, sw.js, conf.js) */ const ASSET_URL = 'https://hunshcn.github.io/gh-proxy/' // 前缀,如果自定义路由为example.com/gh/*,将PREFIX改为 '/gh/',注意,少一个杠都会错! const PREFIX = '/' // git使用cnpmjs镜像、分支文件使用jsDelivr镜像的开关,0为关闭,默认开启 const Config = { jsdelivr: 1, cnpmjs: 0 } /** @type {RequestInit} */ const PREFLIGHT_INIT = { status: 204, headers: new Headers({ 'access-control-allow-origin': '*', 'access-control-allow-methods': 'GET,POST,PUT,PATCH,TRACE,DELETE,HEAD,OPTIONS', 'access-control-max-age': '1728000', }), } const exp1 = /^(?:https?:\/\/)?github\.com\/.+?\/.+?\/(?:releases|archive)\/.*$/i const exp2 = /^(?:https?:\/\/)?github\.com\/.+?\/.+?\/(?:blob|raw)\/.*$/i const exp3 = /^(?:https?:\/\/)?github\.com\/.+?\/.+?\/(?:info|git-).*$/i const exp4 = /^(?:https?:\/\/)?raw\.(?:githubusercontent|github)\.com\/.+?\/.+?\/.+?\/.+$/i const exp5 = /^(?:https?:\/\/)?gist\.(?:githubusercontent|github)\.com\/.+?\/.+?\/.+$/i const exp6 = /^(?:https?:\/\/)?github\.com\/.+?\/.+?\/tags.*$/i /** * @param {any} body * @param {number} status * @param {Object<string, string>} headers */ function makeRes(body, status = 200, headers = {}) { headers['access-control-allow-origin'] = '*' return new Response(body, {status, headers}) } /** * @param {string} urlStr */ function newUrl(urlStr) { try { return new URL(urlStr) } catch (err) { return null } } addEventListener('fetch', e => { const ret = fetchHandler(e) .catch(err => makeRes('cfworker error:\n' + err.stack, 502)) e.respondWith(ret) }) function checkUrl(u) { for (let i of [exp1, exp2, exp3, exp4, exp5, exp6 ]) { if (u.search(i) === 0) { return true } } return false } /** * @param {FetchEvent} e */ async function fetchHandler(e) { const req = e.request const urlStr = req.url const urlObj = new URL(urlStr) let path = urlObj.searchParams.get('q') if (path) { return Response.redirect('https://' + urlObj.host + PREFIX + path, 301) } // cfworker 会把路径中的 `//` 合并成 `/` path = urlObj.href.substr(urlObj.origin.length + PREFIX.length).replace(/^https?:\/+/, 'https://') if (path.search(exp1) === 0 || path.search(exp5) === 0 || path.search(exp6) === 0 || !Config.cnpmjs && (path.search(exp3) === 0 || path.search(exp4) === 0)) { return httpHandler(req, path) } else if (path.search(exp2) === 0) { if (Config.jsdelivr) { const newUrl = path.replace('/blob/', '@').replace(/^(?:https?:\/\/)?github\.com/, 'https://cdn.jsdelivr.net/gh') return Response.redirect(newUrl, 302) } else { path = path.replace('/blob/', '/raw/') return httpHandler(req, path) } } else if (path.search(exp3) === 0) { const newUrl = path.replace(/^(?:https?:\/\/)?github\.com/, 'https://github.com.cnpmjs.org') return Response.redirect(newUrl, 302) } else if (path.search(exp4) === 0) { const newUrl = path.replace(/(?<=com\/.+?\/.+?)\/(.+?\/)/, '@$1').replace(/^(?:https?:\/\/)?raw\.(?:githubusercontent|github)\.com/, 'https://cdn.jsdelivr.net/gh') return Response.redirect(newUrl, 302) } else { return fetch(ASSET_URL + path) } } /** * @param {Request} req * @param {string} pathname */ function httpHandler(req, pathname) { const reqHdrRaw = req.headers // preflight if (req.method === 'OPTIONS' && reqHdrRaw.has('access-control-request-headers') ) { return new Response(null, PREFLIGHT_INIT) } const reqHdrNew = new Headers(reqHdrRaw) let urlStr = pathname if (urlStr.startsWith('github')) { urlStr = 'https://' + urlStr } const urlObj = newUrl(urlStr) /** @type {RequestInit} */ const reqInit = { method: req.method, headers: reqHdrNew, redirect: 'manual', body: req.body } return proxy(urlObj, reqInit) } /** * * @param {URL} urlObj * @param {RequestInit} reqInit */ async function proxy(urlObj, reqInit) { const res = await fetch(urlObj.href, reqInit) const resHdrOld = res.headers const resHdrNew = new Headers(resHdrOld) const status = res.status if (resHdrNew.has('location')) { let _location = resHdrNew.get('location') if (checkUrl(_location)) resHdrNew.set('location', PREFIX + _location) else { reqInit.redirect = 'follow' return proxy(newUrl(_location), reqInit) } } resHdrNew.set('access-control-expose-headers', '*') resHdrNew.set('access-control-allow-origin', '*') resHdrNew.delete('content-security-policy') resHdrNew.delete('content-security-policy-report-only') resHdrNew.delete('clear-site-data') return new Response(res.body, { status, headers: resHdrNew, }) }
- 黏贴完毕后我们可以按键盘的
Shift+S,保存代码,然后点击右上角的部署,要出现最下面绿色的提示:版本已保存,才可以噢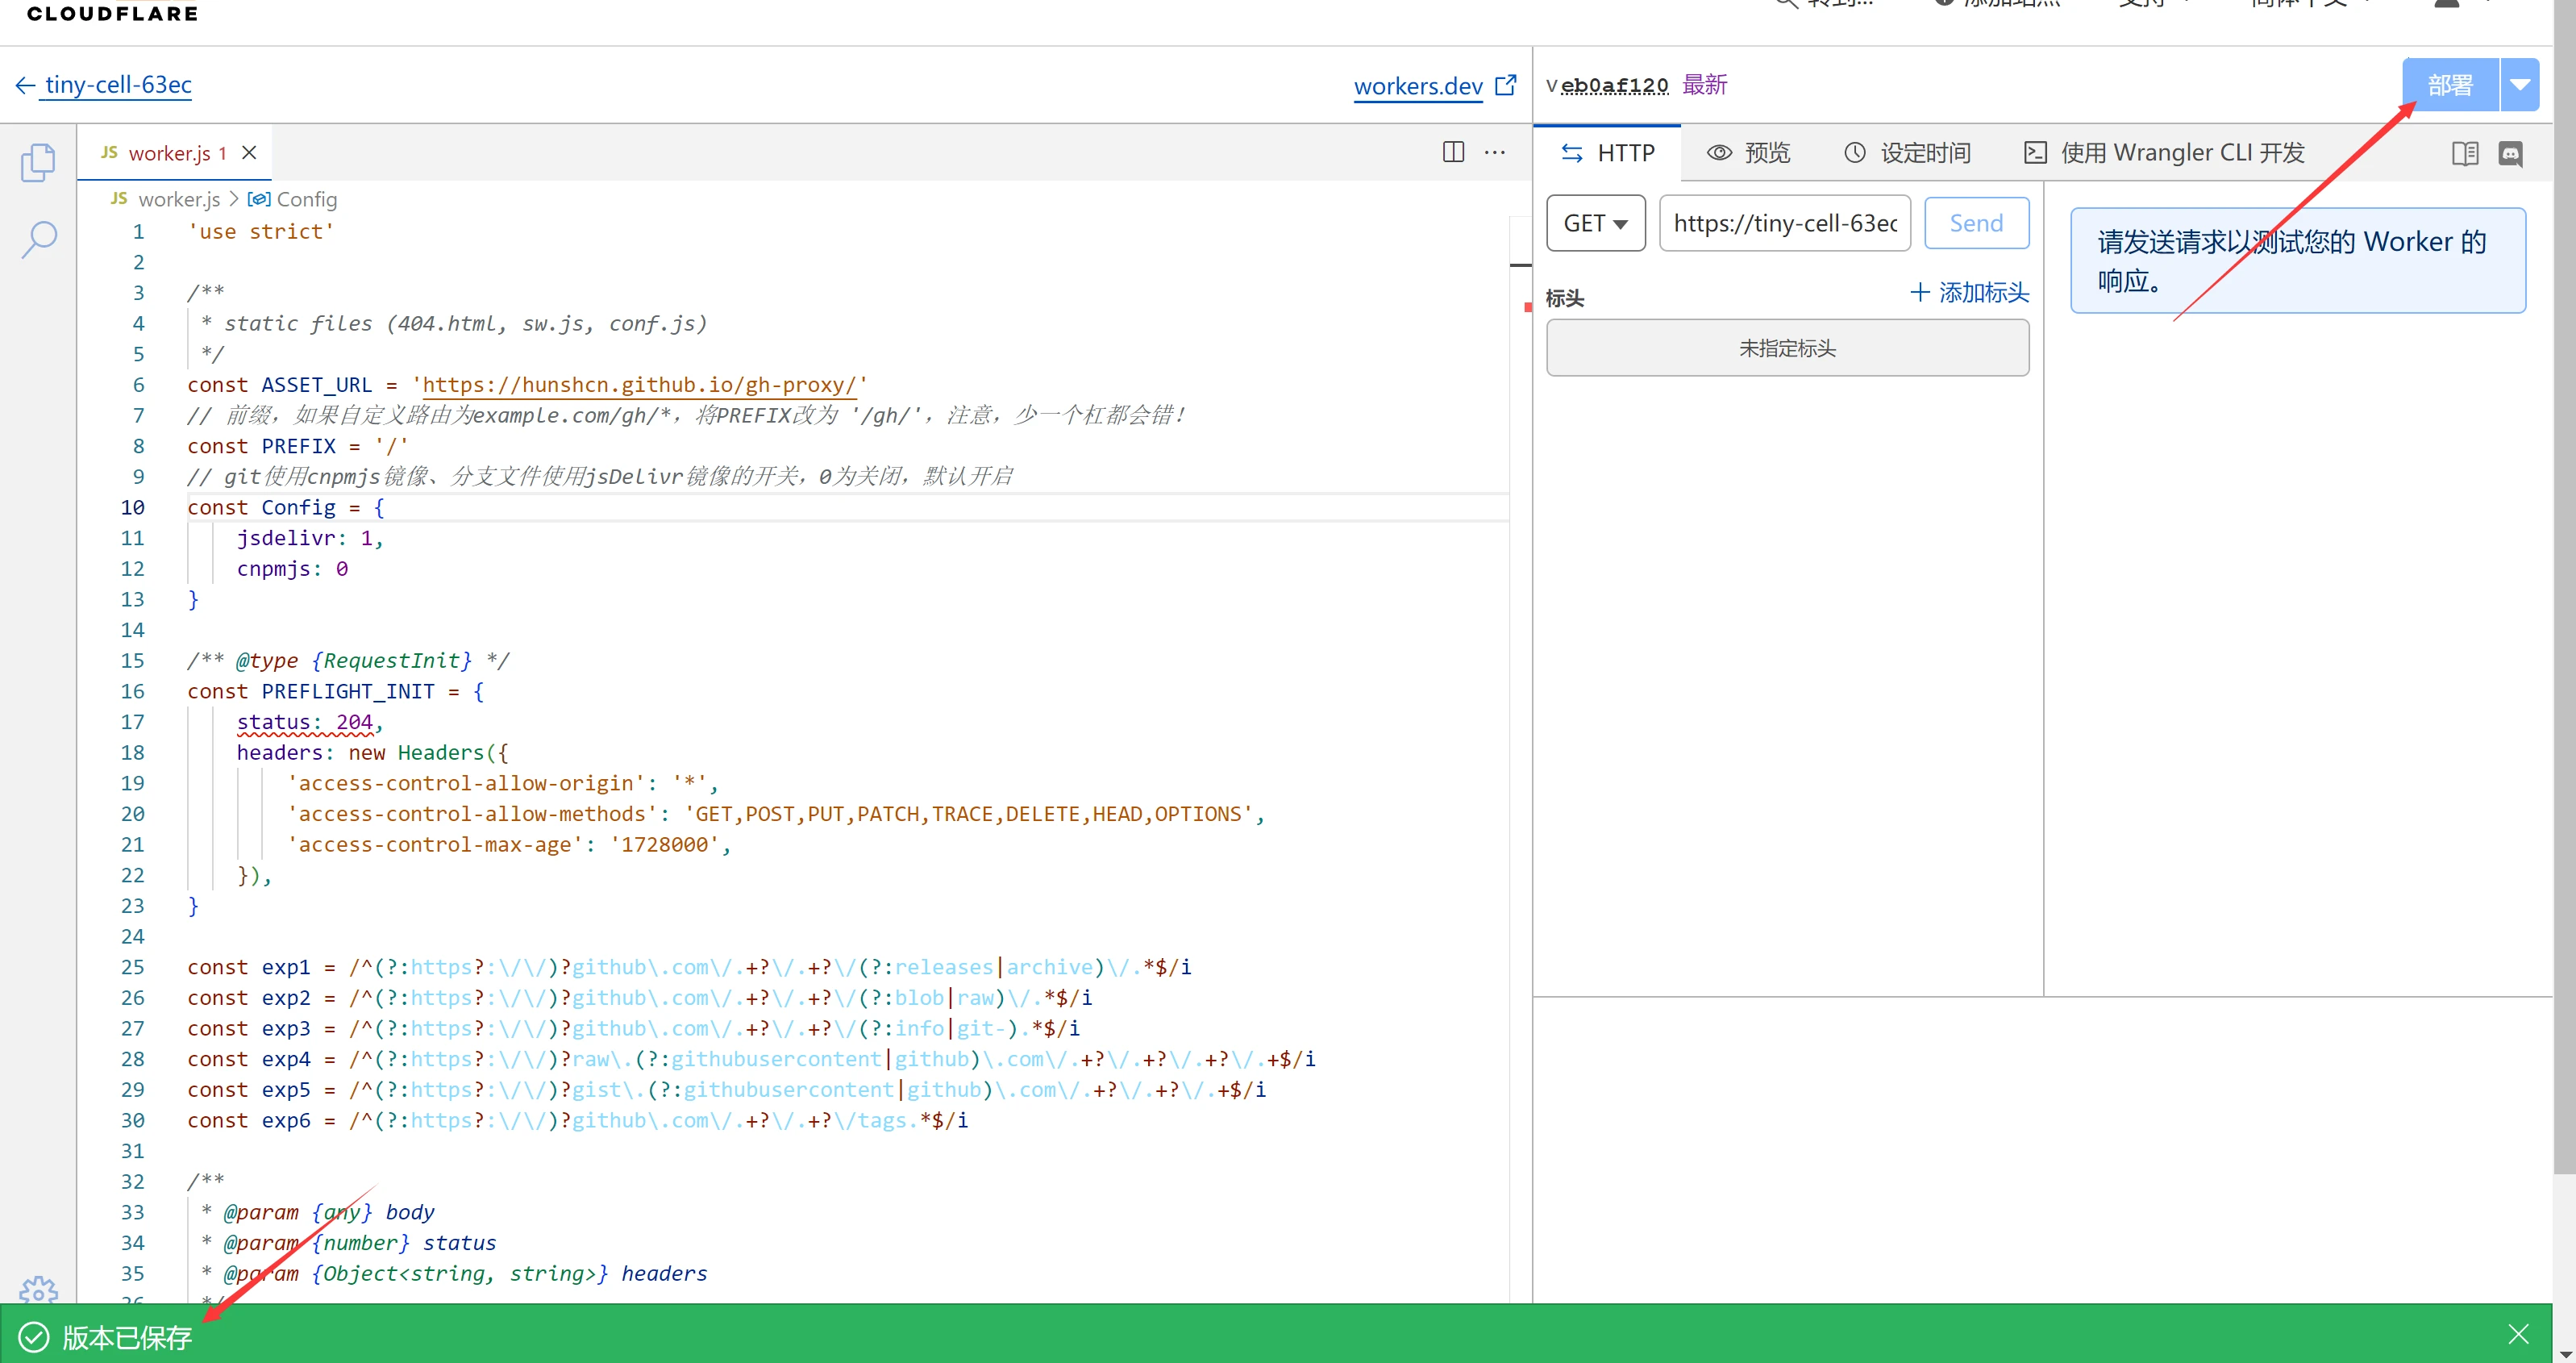
- 完事后点击
左上角返回,点击设置--触发器--在添加自定义域那里填写你需要展示的二级域名,如果你一开始创建cloudflare后绑定打算使用的域名是:xxx.xx那你这里就需要填写123.xxx.xx(这里123可以替换,XXX.XX就是你的域名,自己替换一下。)搞定后就可以点击右下角的添加自定义域即可。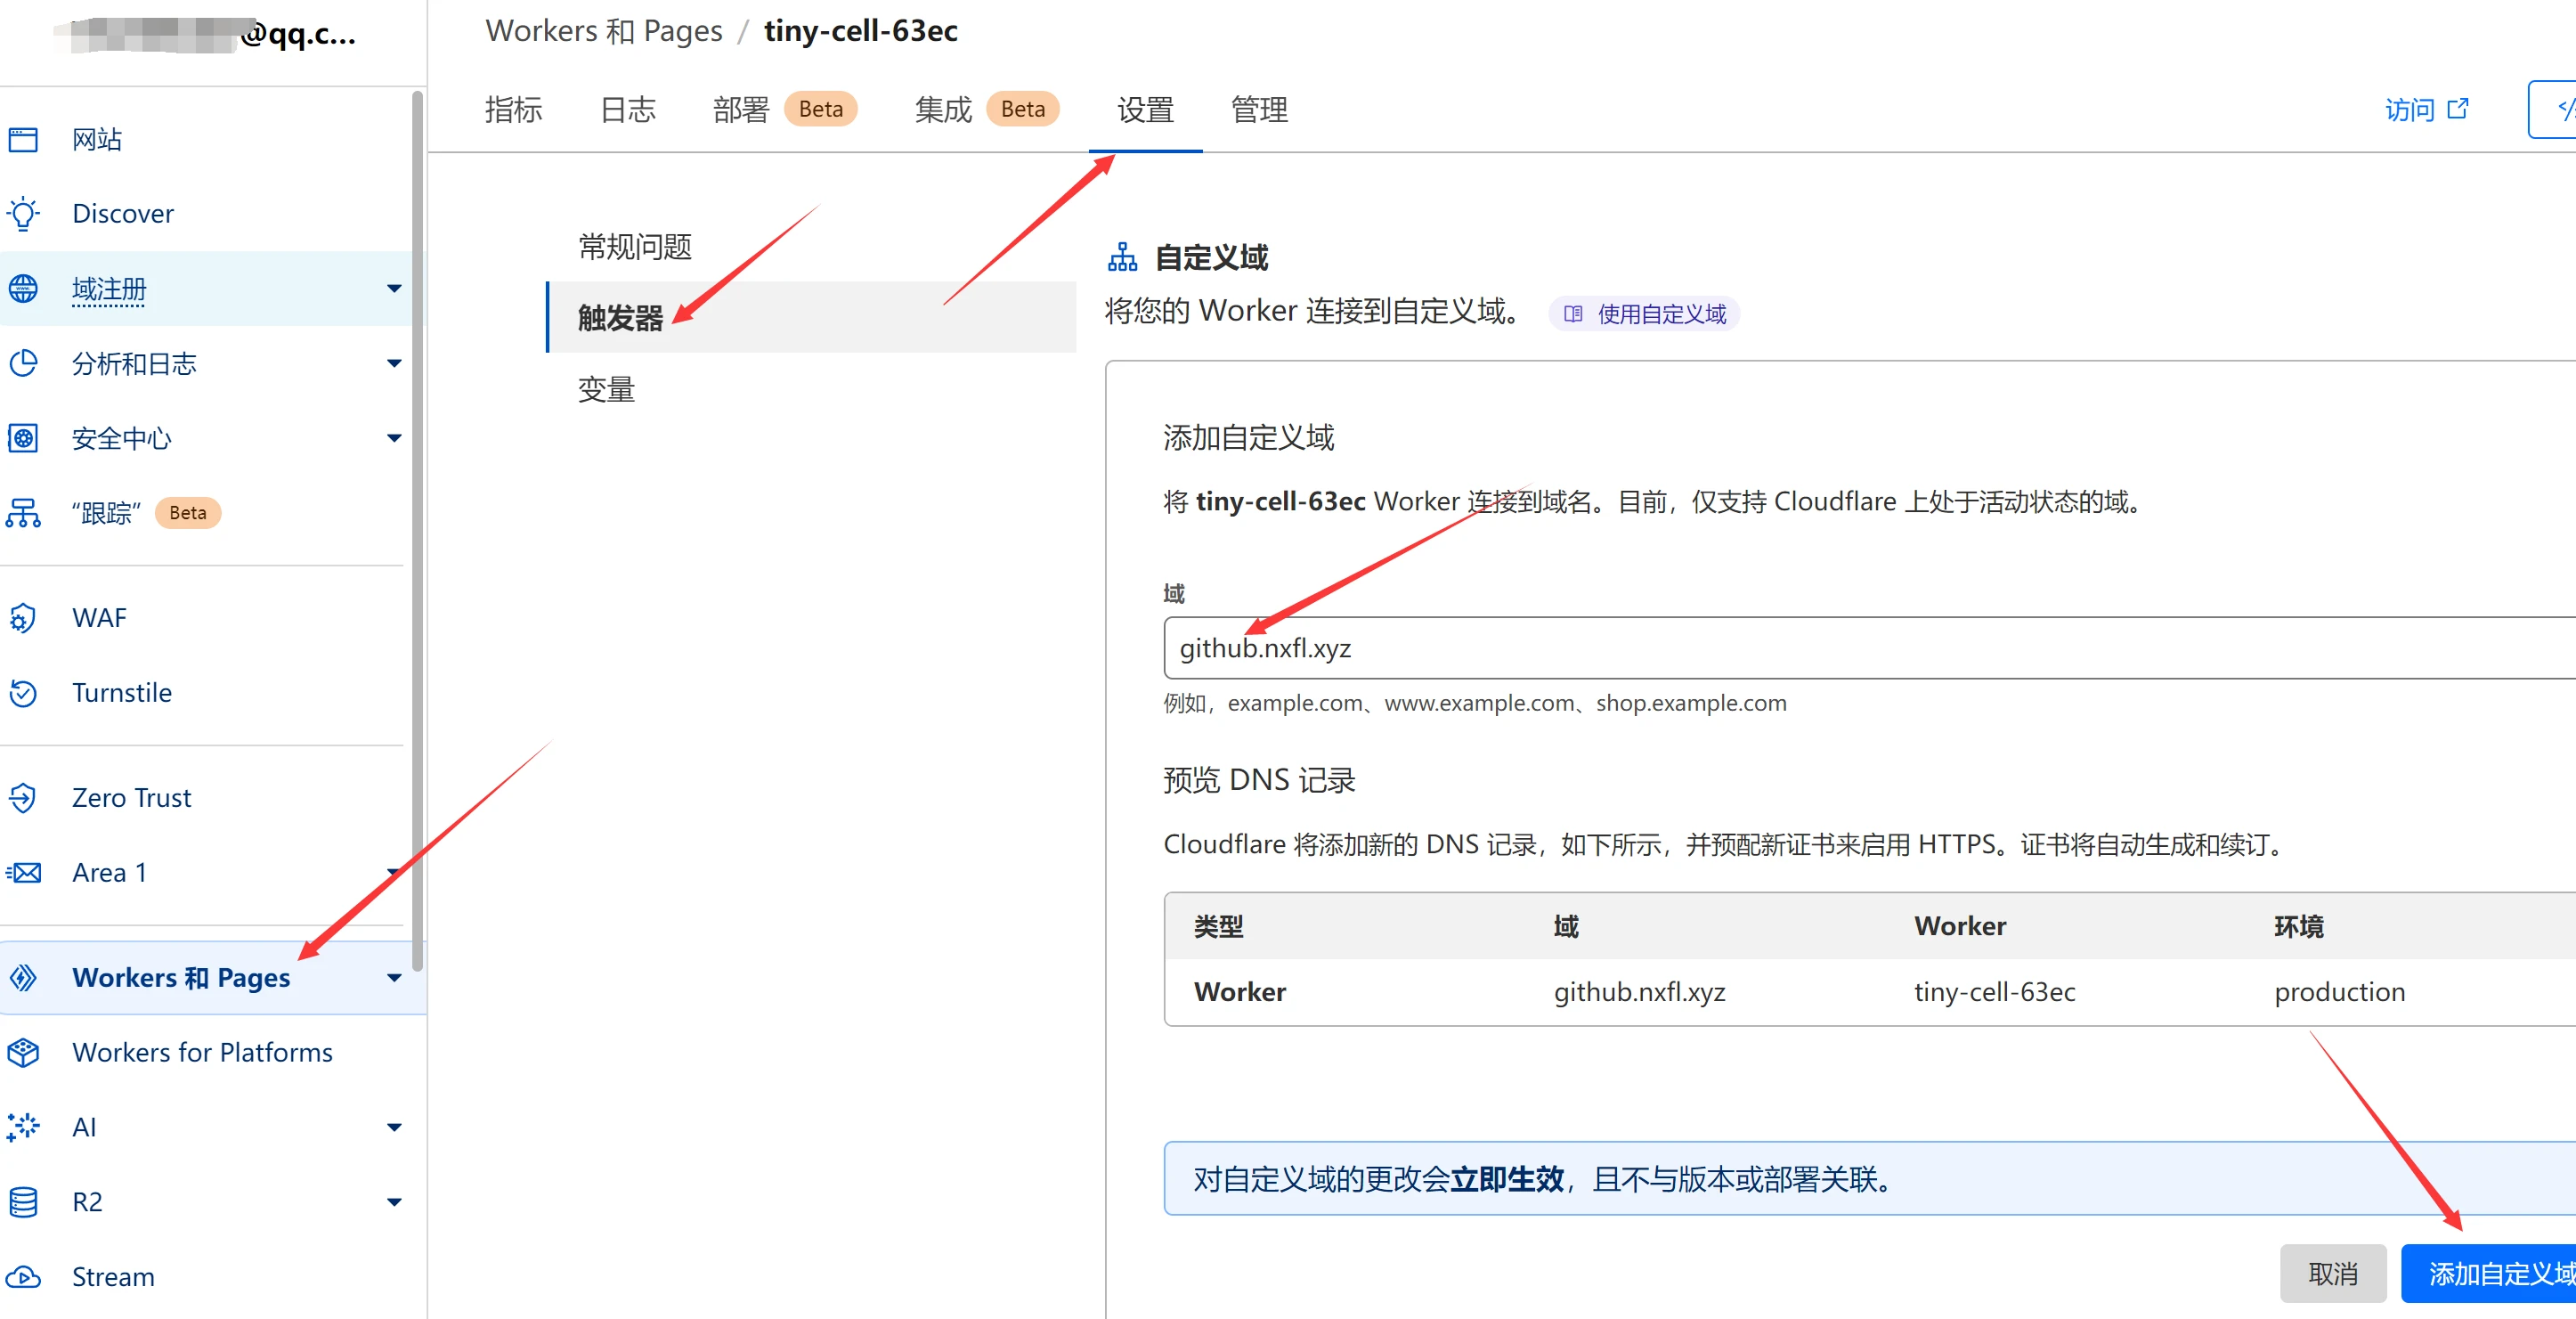
- 验证是否成功,输入你
上述填写的域名,然后点击打开就行了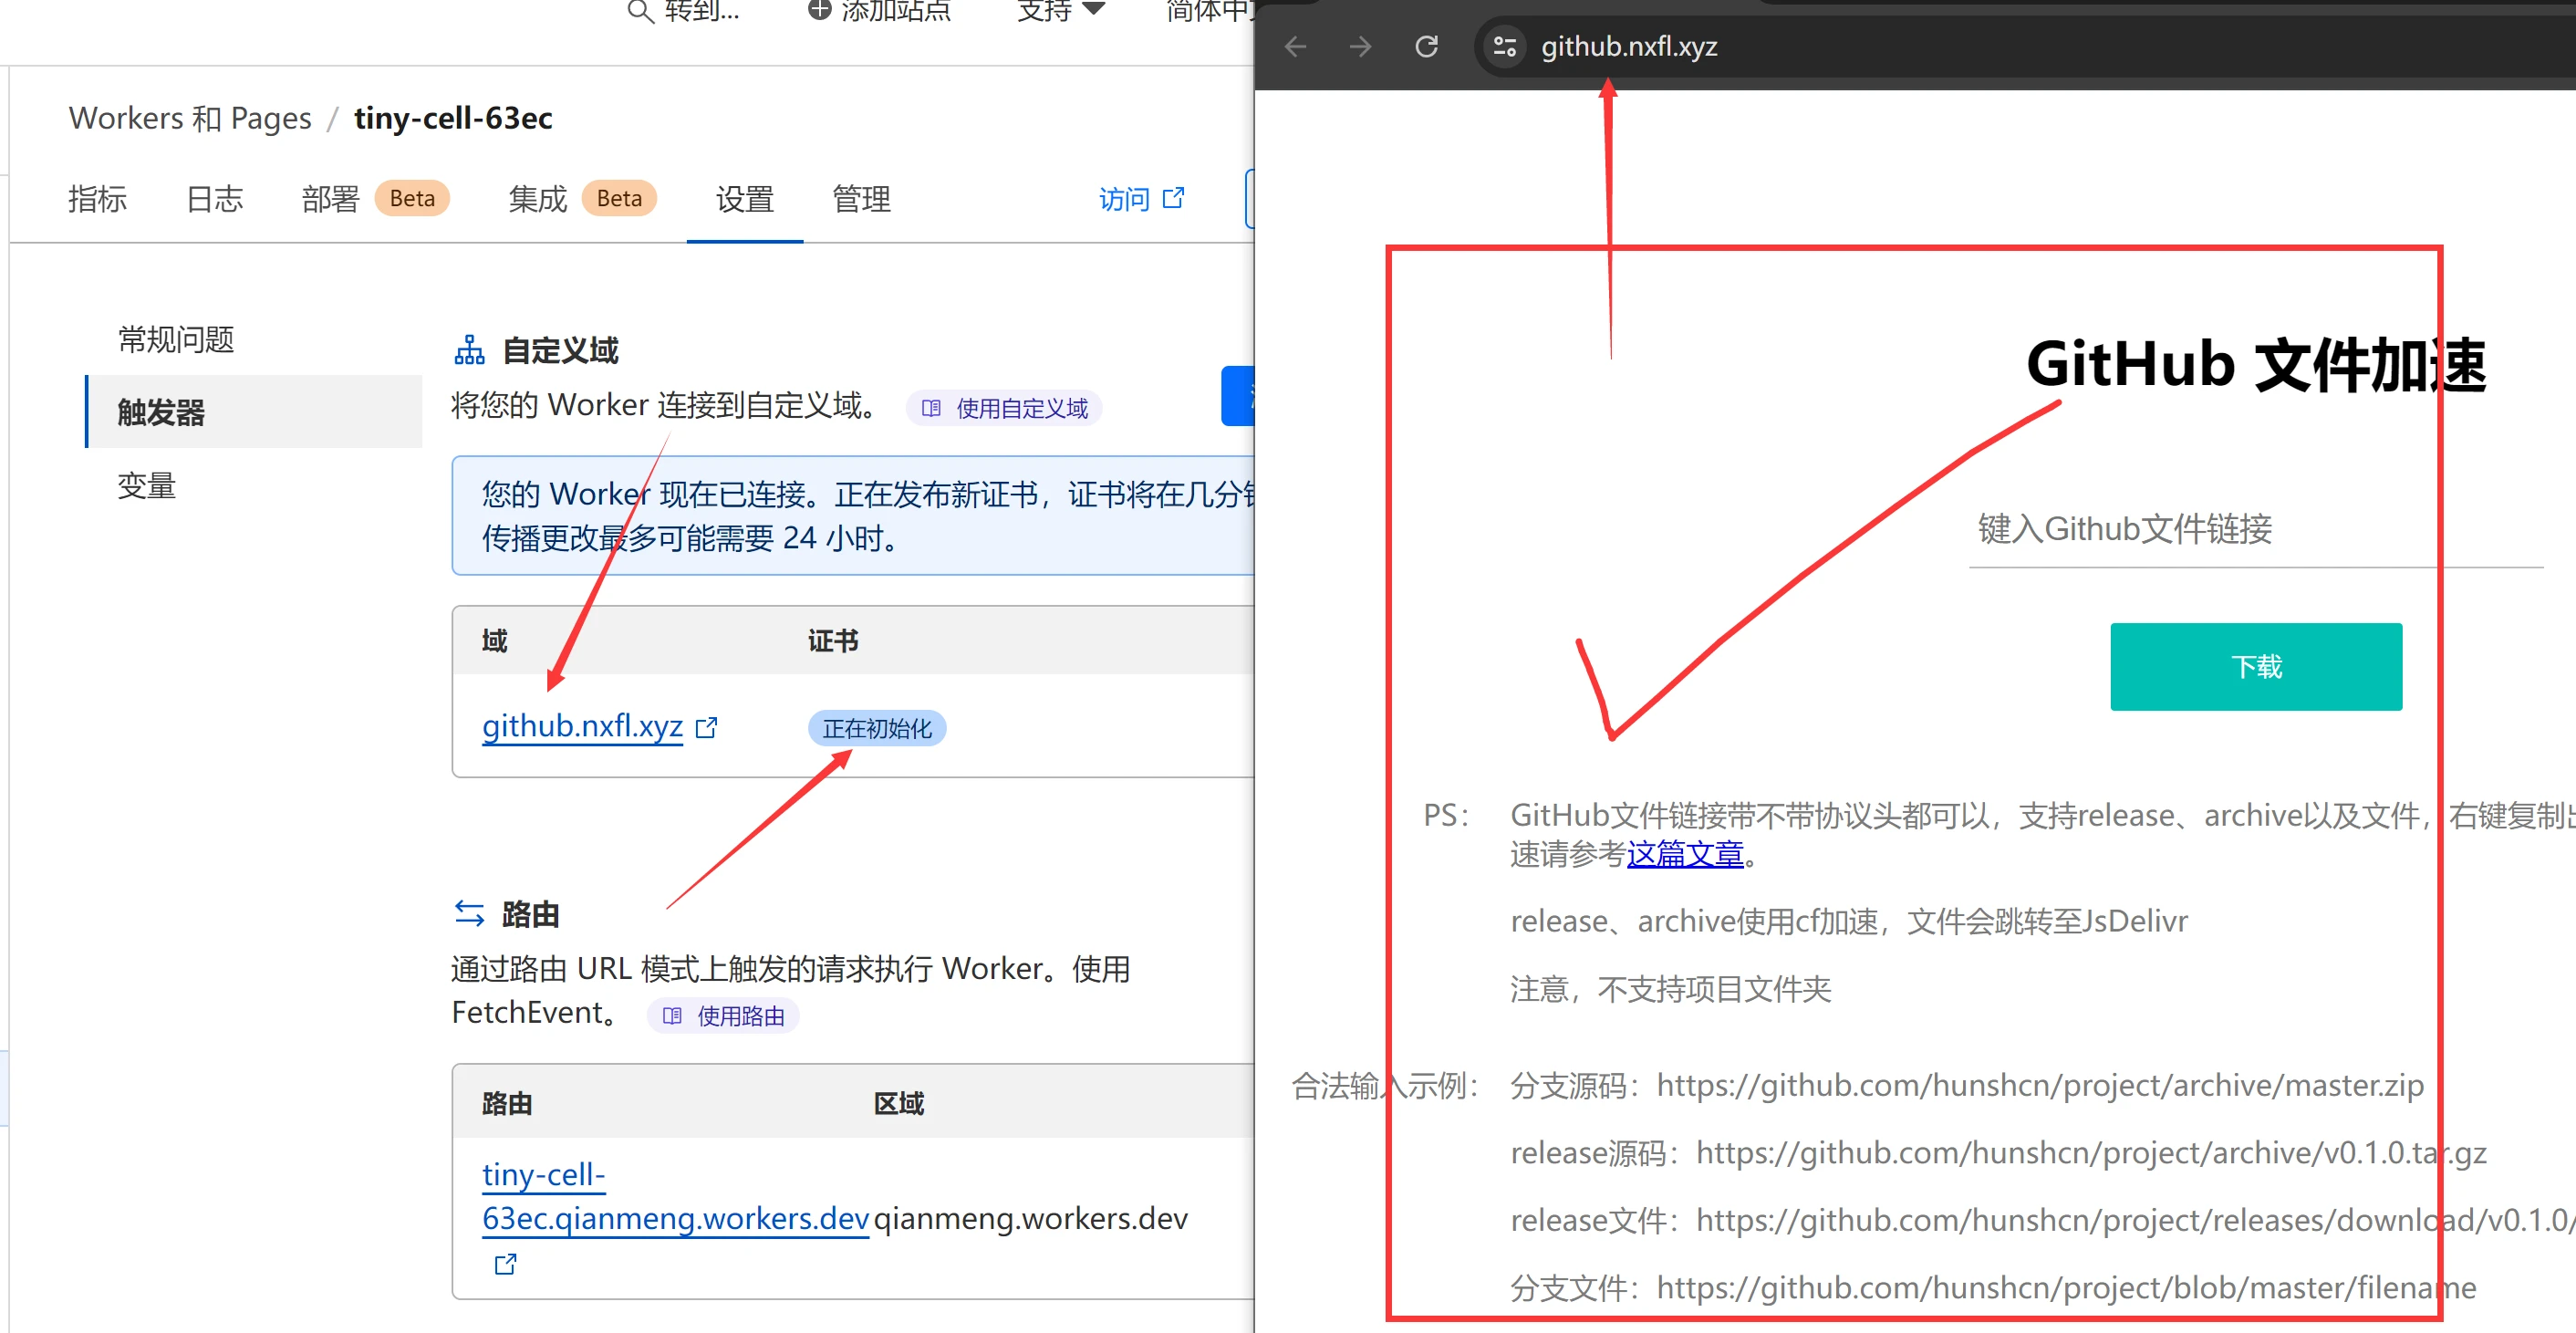
关于如何加速
比如原项目是
https://github.com/xxx/xxx.zip那你要添加的展示为:
https://123.xxx.xx/https://github.com/xxx/xxx.zip阅读剩余
版权声明:
作者:落幕
链接:https://lmu5.com/github-1.html
文章版权归作者所有,未经允许请勿转载。
THE END
